Header

Header
Showing posts with label DIY. Show all posts

Friday, December 11, 2015

Homemade Holiday Face Masks | Blogmas Day 11


My skin tends to go a little haywire in the winter months, so masks have become an essential part of my skincare routine. Face masks have an array of advantages, from brightening dull skin, exfoliating, soothing irritated skin amongst other benefits, and nothing is better than a mask made from fresh ingredients found right in your kitchen. Today I have 4 tried and true homemade face masks for you to try out this winter! And the best part is each one literally takes minutes to make.

1. Pumpkin Oatmeal Mask


2 tbsp. raw pumpkin
1 tbsp. rolled oats
1 tbsp. honey

Pumpkin is amazing for your skin. It contains vitamins A and D which can help to soften, soothe and brighten skin. Add in the astringent properties of honey and the exfoliating potential of the oatmeal and you have a good mask to help irritated dull skin when mixed together.

2. Ginger and Honey Mask
2 tbsp. Ginger Juice (throw ginger root and water in blender, strain)

1 tbsp. Honey

Ginger is awesome to treat acne scars because of the natural anti-inflammatory elements it contains. Mixed with the honey, and you have an excellent mask for acne clearing. Simply apply the mask, wait 20 minutes and gently wash off. *Fresh Ginger can also be used to dab on acne spots as a spot remover.

3. Cocoa Coffee Mask


1 tbsp. unsweetened cocoa
1 tbsp. ground coffee beans
1 1/2 tbsp. almond oil (or any carrier oil)

Coffee is known to reduce inflammation and redness and as an exfoliator, it gently removes dead skin and gives life to a dull complexion. Cocoa is a good source of antioxidants and it also contains sulfur, which is great for fighting acne. Simply mix together to make a paste, apply to face an after about 20 minutes gently wash off of your face.

4. Sweet Potato Ginger Mask

3 tbsp. mashed sweet potato (cooked)
2 tsp. grated fresh ginger
1 tbsp. honey
1 tbsp. milk/almond milk/ soy milk

Before you toss those sweet potatoes in your casserole, save a little for this mask! Sweet potatoes are known for their anti-inflammatory and anti-aging properties and mixed with the honey and ginger it becomes a mask that'll leave your skin seriously smooth and brighter. Just blend all ingredients until smooth, apply to face for about 30 minutes and gently scrub off.

I hope you find these facial mask ideas helpful! Let me know if you try any and what your thoughts are!

xoxo
LivforLashes

**images from Google**

Follow me on Twitter! @LivforLashes

Find me on Instagram @livforlashes

Monday, September 28, 2015

Pinterest DIY | Mirror Perfume Stand


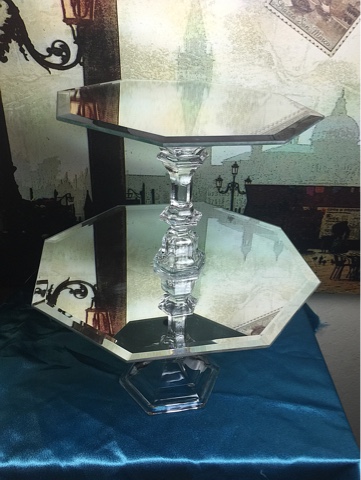
I was browsing Pinterest the other night and came across something I'd seen a million times before: DIY cupcake/cosmetic stands. I've always thought they look pretty cool but never really thought about making one until now. It looked simple enough with minimal supplies needed so I decided to give it a go. After a quick trip to Hobby Lobby with supplies in hand I got to work.


What you'll need:
Mirrors (one for as many levels as you want your stand)
A ruler
E6000 glue (perfect for binding glass) 
Candle holders 
Lip liner 


1. Use your ruler to measure the backs of the mirrors to find the center and mark it with the lip liner. I chose to use a liner since it washes off. 


2. Do the same thing to measure the bases of the candle holders to mark where they would be centered on the back of the mirrors. REMEMBER: Mark the wider end of the candle holder to be glued to the back of the mirror for your bottom tier for better stability of your stand. Mark the smaller end to be glued to the backs of your other tiers. 


3. Apply a generous amount of the E6000 along the edge of the candle holder. This dries clear so don't worry too much about making a little mess with the glue. NOTE: this glue has a very strong smell so be sure to use it in a well ventilated area and avoid inhaling it. 


4. Press the candle holders carefully to the back of the mirrors, holding firm pressure for a minute or two. Now let each tier dry before trying to stack them. The glue takes a minimum of 24 hours to cure, so some patience is needed :)


5. With your cured tiers, mark the top side of the mirrors the same as steps 1 and 2. 


6. Again, apply the glue to the edge of the candle holder to adhere the tiers together. Be more careful with the glue this time to avoid smearing it on the mirrors. If you do make a mess, you can dissolve the glue (before it's cured) with some acetone on a q-tip or cotton ball. 


7. Allow it to cure completely before use. I let mine set for a good two days before setting up my perfumes. 


And voila! A cute perfume stand perfect for displaying your favorite scents! I can't believe how simple it was to make this and how cheap too! So easy and I think it turned out pretty well. The mirrors and crystal candle holders are so chic yet its understated and simple. 


What do you think? Is this something that you'd want to try? Let me know! And let me know if you enjoyed this post or if you'd like to see more DIY posts. Have an amazing day and thank you for reading!


xoxo
LivforLashes


Follow me on Twitter! @LivforLashes


Find me on Instagram @livforlashes


Email: liv_2008@icloud.com

Saturday, March 14, 2015

St. Patrick's Day Nails | Water Marble How-To

Hello again everyone! I wanted to do another nail tutorial for you guys and what better excuse than St. Patricks Day coming up in a few days? I'm not usually a huge fan of green nails, but for holidays, it's a fun way to show some spirit. Plus, no one can pinch you for not wearing green ;)

This how-to is slightly more complex than my other manicures, as it is a water marble technique. Water marble manicures are kind of messy and time consuming, but the outcome is so pretty once you get the hang of it. 

In this tutorial, I'm going to show you the technique and you can either use it one all of your nails, or just for accent nails like I have done. And at the end, I'll show you how to water marble a cute shamrock for St. Patricks day! 

What you'll need:
3-4 polishes (I picked light green, dark green and a silver glitter)
A plastic container with cold water
School glue (optional)
Acetone polish remover
A small brush for clean up
Q tips
A safety pin or toothpick

Start out by applying the glue with a q tip around you cuticle and the skin of your fingertip. This will help prevent some of the messiness. 

Now grab your container with the cold water. I would use something that you don't mind ruining. I keep this little TupperWare container handy specifically for water marbleing. Take a polish and add a drop to the water. 

Working quickly, add a drop of the next color you want, right in the center of the first color. 

Do the same with the next color. It's important to work fast so the polish doesn't set. I keep all of my nail polishes completely unscrewed and ready for this. 

Continue adding drops until you get the color pattern that you desire. 

Now grab your safety pin or toothpick (I use the pin so the polish doesn't stick to the wooden toothpick) and gently drag it along the rings of polish to create the marble design. 

Once you have a design that you like, dip your finger as flat as you can into the design. Use a q tip to pull the extra polish on the water away from your finger. 

You should have something like this. 

It looks super messy but that's what the glue was for. Gently wipe away the excess polish and glue with a cotton pad with some acetone on it. The glue shields the skin so it should scrap away easily. Any excess polish around the cuticles can be removed with some acetone on a small brush. The e.l.f. concealer brush is great for this. Now with a qtip, drag it along water to pick the excess polish in the water to prepare for the next design. Seal your design with a top coat and that's it! It looks much more complex than it really is. 

A few tips:
*use nail polishes with a thinner consistency. I like Pure Ice, China Glaze and Essie for water marbles. Thicker polishes won't spread in the water as well and you design will come out chunky and it won't dry.
*once you draw your design with the pin, let it sit for a minute or two to allow the colors to set. This makes it easier to apply. 
*letting the design set for even longer will allow the polish to harden. You can then use a toothpick or qtip to gently pull it out of the water and use it as a decal. Just cut off the excess polish like you would a nail wrap. 
*the amount of drops of polish you add will determine the intensity of the marble design. Adding a lot will give you a more tye-dye effect. 
*allow the design to dry completely before adding a top coat. If you try to seal the design while the nail is still tacky and wet with water, it will smudge and NEVER dry!

To do a shamrock:
Do the same steps of adding polish to the water. Now with the pin, gently drag it from the outside of the polish to the center. 

Slowly drag it on the opposite side, going towards the middle. 

Now do the same thing between the first two spots. 

Finish it by doing the opposite side again and there you have it! A shamrock! Let it set and apply to your nail. 

Well thank you for reading and I hope you liked this post! Tag me in any of your water marble designs on Instagram using #livforlashes. I'd love to see them!


Follow me on Twitter! @LivforLashes

Find me on Instagram @livforlashes

Email: liv_2008@icloud.com


Sunday, September 14, 2014

DIY Facial Serum + Essential Oils Chat


Foundation, as we all know, creates a base to which we apply our makeup. But foundation also needs a base, and I don't mean primer. A flawless face starts with flawless skin. Most women have at one point or another had it beaten into them to cleanse, exfoliate and moisturize their skin. It cleans out our pores, removes dead skin cells and locks in moisture. But do you use a serum, too?

Serums are mixtures of pure essential oils and ingredients meant to improve qualities of our skin, be it redness and irritation, dryness, etc. Serums have been around for centuries and within the last few decades they have become very popular. But what exactly is a serum comprised of?

Serums are a combination of a carrier oil and essential oils. The carrier oil is the base liquid of a serum. Popular carrier oils are rose hip oil, sweet almond oil and jojoba oil. Essential oils are any pure oils derived from natural sources, like lavender oil, tea tree oil, etc. Each essential oil has it own therapeutic use. It may seem odd to apply oil to your face, but the particles in essential oils are so small, they are easily absorbed into the skin, unlike lotions that are made up of products that sit on top of the skin.

In this DIY project I will be showing you how to mix up your own facial serum using lavender oil, geranium oil and tea tree oil. You can use any oils you like depending on your individual skin care needs. For my carrier oil, I will be using sweet almond oil. This is my go-to serum that I apply on my face twice a day, morning and night. the best part of this, is that you control what substances you put into your skin. This is all organic, natural products. First, let's take a quick look at our ingredients.

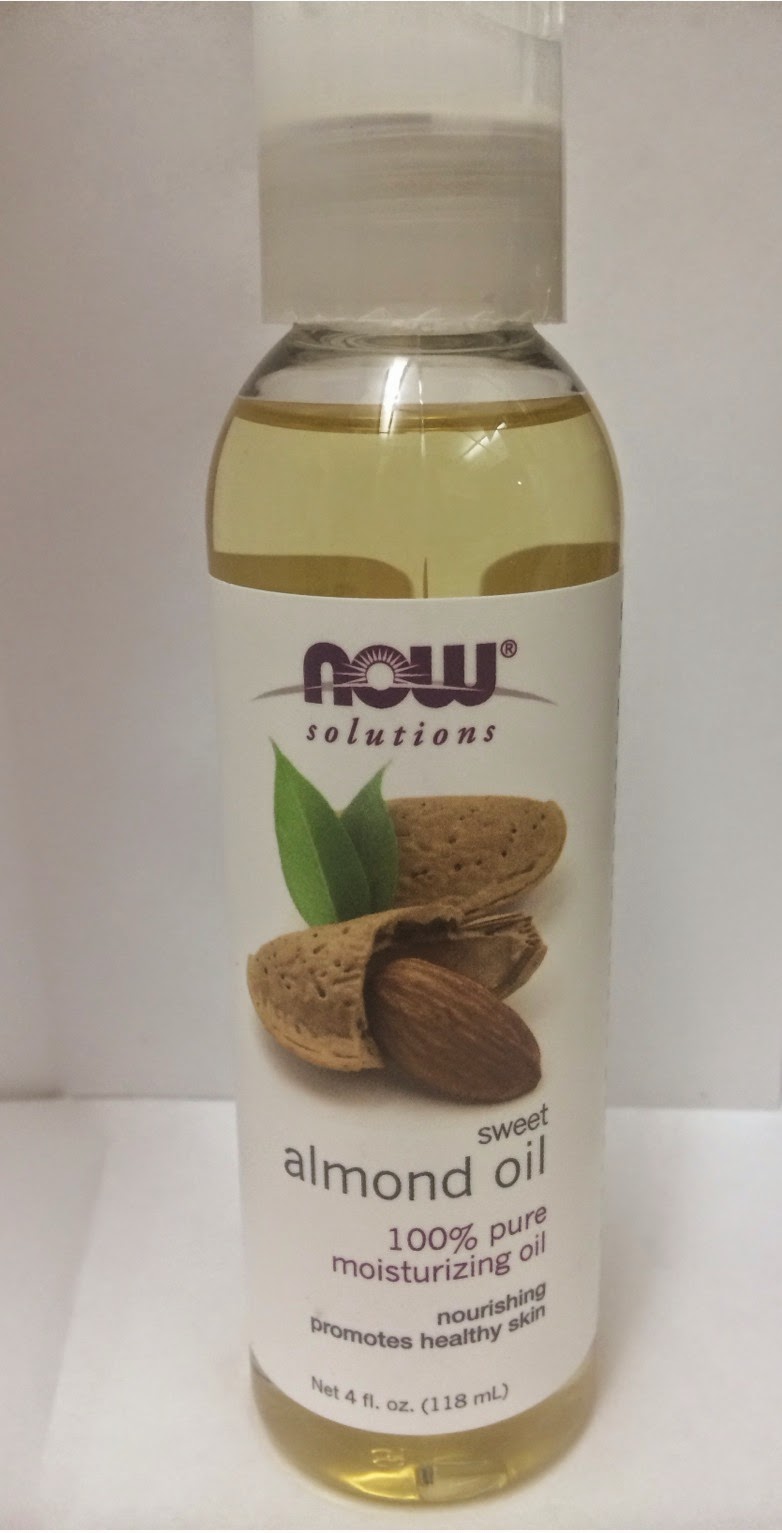
Sweet Almond Oil

This will be the carrier oil. Almond oil is great as a natural skin moisturizer. It is high in vitamins A, B and E which makes it wonderful for soothing irritated skin.

Lavender Oil
This is the first of our essential oils. Lavender is widely used as a calming agent. It has a natural soothing effect on the skin as well as also helping with redness and irritation. If you were to ever buy one oil, this is it, since it is so versatile.

Tea Tree Oil
Tea tree oil is popular as a natural astringent. It soothes irritated skin, like acne prone skin. It has antibiotic, anti-fungal and infection properties. It also jealous treat acne and relieves itchiness.

Geranium Oil
Geranium oil is a little pricey but so worth the cost. It is a great oil for revitalizing skin, acne treatment and like the others, it also has a calming effect on the skin.

I found all of my supplies at Sprouts, but a lot of these items you can find almost anywhere like walmart, your local pharmacy and health food stores in the aromatherapy section.

Let's get started!

First, fill a small glass container about 3/4 of the way full. I found this one with a dropper top at Sprouts For $1.99


Next, add a few drops (3-4) of the lavender oil. Use the dropper to gently mix together.

Then, add 3-4 drops of the tea tree oil. Mix this again.

Finally, add 2-3 drops of the geranium oil. This oil smells like roses, so depending on how strong you want it to smell, you can adjust the never of drops you put in. Mix again and that's it! Simple right?

Use this mixture starting once a day by pea-sized amount or two and gently massaging it into your face for a minute or two. It will feel very greasy at first and you'll probably panic, but don't worry, the oils will soak into your skin within a few minutes leaving you with soft skin. I use it twice a day, sometimes mixing it into my moisturizer.

I hope you guys found this helpful! Be sure to comment and let me know if you tried this at home! I'd love to hear what mixtures you came up with!

xoxo
LivforLashes

Click here for an in-depth list of esstial oils and their uses!

Follow me on Twitter! @LivforLashes

IG @livforlashes come check out my page, follow and like!

Email: liv_2008@icloud.com